
Properly storing your homemade moisturizing mask is important to keep it fresh and effective for your skin. This step-by-step guide will show you how to store it correctly, ensuring that it stays nourishing and ready to use whenever you need it. By following these simple instructions, you can prolong the shelf life of your mask and continue to enjoy its benefits for a healthy, glowing complexion. Remember, taking care of your skin starts with taking care of your products.
Nourish and Hydrate Your Skin


1. Gather the necessary materials
To successfully gather the necessary materials for your project, make sure you have the following items ready:
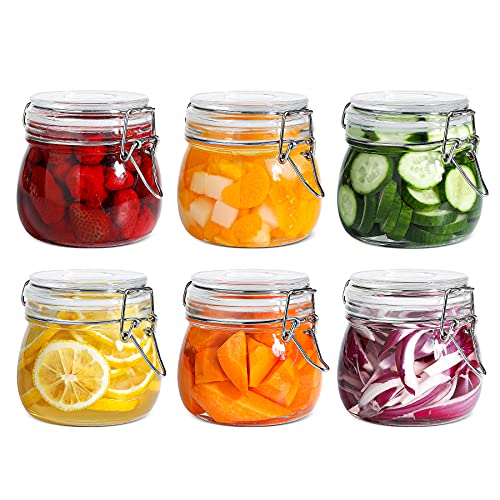
- A clean container with an airtight lid: It is important to select a container that is free from any dirt or residue. An airtight lid will help preserve the contents of your project and prevent any unwanted odors or spills. For example, you can use a glass jar with a tight screw-on lid or a plastic Tupperware container with a snap-lock seal.
- A spoon or spatula for scooping: You will need a utensil to efficiently transfer and measure your materials. A spoon works well for ingredients like powders or liquids, while a spatula is better suited for thicker substances like creams or pastes. For instance, if you are collecting ingredients for a homemade face mask, a spatula can help you scoop and mix the desired amount of clay or honey.
- Additional labeling materials, if desired: If you want to keep your materials organized or provide instructions for future reference, labeling is a helpful step. You can use stickers, sticky notes, or a marker to write down the name or purpose of each item. For example, if you are gathering ingredients for a spice blend, labeling each container with the name of the spice will make it easier to identify later on.
Remember to gather these materials before you begin your project to ensure a smooth and hassle-free experience.


2. Allow the mask to cool
After preparing the homemade moisturizing mask, it is essential to allow it to cool completely before proceeding further. Cooling the mask ensures that any residual heat from the preparation process dissipates and prevents condensation from forming inside the container. By taking this simple step, you can avoid potential spoilage and ensure the longevity and effectiveness of your homemade mask.
To cool the mask, there are a few simple steps to follow. First, remove the container or bowl containing the mask mixture from any heat source or warm environment. Place it on a heat-resistant surface or a cooling rack to allow air circulation. Avoid covering the container during the cooling process, as this can trap heat and cause condensation. Let the mask sit undisturbed until it reaches room temperature. Depending on the ingredients used and the quantity of the mixture, cooling time may vary. Once the mask has completely cooled, it will be safe to store in a clean, airtight container for future use.
By giving your homemade moisturizing mask ample time to cool and ensuring that no condensation forms, you are taking a proactive step towards preserving its quality and avoiding the possibility of spoilage. This will allow you to enjoy the benefits of your mask for an extended period, providing your skin with the care and nourishment it deserves.
3. Transfer the mask to the container
To transfer the moisturizing mask into the clean container, gently scoop or slide it using a spoon or spatula. Handle it with care to prevent any spillage or contamination. Prior to transferring, ensure that the container is clean and completely dry. This is crucial in preserving the freshness and effectiveness of the mask.
4. Seal the container tightly
To ensure the mask remains effective and lasts longer, it is crucial to seal the container tightly. Please follow these steps to secure the airtight lid on the container:
- Place the mask inside the container carefully, making sure it is clean and dry.
- Align the lid with the container’s opening and ensure it is free from any debris or contaminants.
- Press down firmly on the lid, using both hands if necessary, to create a tight seal.
- Double-check if the lid is properly locked in place by gently attempting to lift it. It should not come off easily.
- Store the container in a cool, dry place away from direct sunlight or excessive heat.
By sealing the container tightly, you will prevent air and moisture from entering, which can degrade the mask and reduce its effectiveness. Following these simple steps will help preserve the mask’s properties and extend its shelf life, ensuring that it remains ready to use when you need it the most.
5. Label the container
Label the container with the date of preparation and the name of the moisturizing mask. By doing so, you will ensure that you have a clear record of its freshness and usage. It is important to take a moment to write down the date when you prepare the mask and include the name of the mask on the label. This simple step will make it easier for you to keep track of how long the product has been sitting in your fridge and when it should be used by. Additionally, having the name of the mask on the label will prevent any mix-ups or confusion when selecting which mask to use. So, grab a marker or a label, and take a few seconds to label your container. Your skin will thank you for it!
6. Store in a cool, dark place
To secure proper storage for your mask, ensure that you find a suitable location such as a cupboard or refrigerator. By placing it in these spaces, you can safeguard the mask from direct sunlight and heat sources. Exposure to these elements can compromise its effectiveness and lead to spoilage.
When selecting a location, prioritize cooler areas with minimal light. This will help maintain the mask’s quality and maximize its longevity. Remember, a dark place is key here. Whether it’s a designated storage cupboard or a specific spot in your refrigerator, make sure it’s away from direct sunlight and any potential heat sources.
By practicing these simple storage guidelines, you can preserve the efficacy of your mask and avoid any potential deterioration. Remember, a cool and dark place is a caring choice for your mask’s wellbeing.
Protecting Your Homemade Skincare
In conclusion, taking care of your homemade moisturizing mask is essential to maintain its efficacy. By implementing the steps mentioned in this blog post, you can extend the lifespan of your mask and continue to enjoy its nourishing benefits. Remember, a little effort in proper storage goes a long way in ensuring your skin receives the maximum benefits from your homemade creation. Take care of your mask, and it will take care of you!
Essential Supplies
- Homemade moisturizing mask
- Container for storing the mask
- Labels for labeling the container


Maximizing Mask Longevity
- Store your homemade moisturizing mask in an airtight container or jar to maintain its freshness and prevent exposure to air and bacteria
- Keep the container in a cool and dry place, away from direct sunlight or heat, as excessive heat can degrade the ingredients in the mask
- Label the container with the name and date of the moisturizing mask, so you can easily identify it and keep track of its expiration date
- If you have made a large batch of the mask, consider dividing it into smaller portions and store them separately. This will minimize the risk of contamination and allow you to use the mask for a longer duration
- Avoid storing the mask in the bathroom, as the fluctuating temperature and excessive humidity can affect its quality and shelf life
- Use clean and dry fingers or a spatula to scoop out the mask, as this will help maintain its hygiene and prevent contamination
- Avoid introducing water or any liquid into the container, as this can lead to bacterial growth and spoil the mask
- Regularly check the consistency, color, and smell of the mask. If you notice any changes, such as an unpleasant odor, discoloration, or separation, it is best to discard the mask and make a fresh batch
- Ensure that the container is tightly sealed after each use to prevent air exposure and maintain the mask’s potency
- Finally, always follow the recommended storage guidelines provided with specific recipes or ingredients, as certain mask formulations may have unique requirements for maximum effectiveness and longevity
Step-by-Step Instructions for Achieving Hydrated and Nourished Skin
- Start by cleansing your face: Before applying the moisturizing mask, ensure your face is clean and free from any dirt or makeup. Use a gentle cleanser that suits your skin type and rinse thoroughly with warm water
- Pat your face dry: After cleansing, gently pat your face dry with a soft towel. It’s important to avoid rubbing your skin, as this can cause irritation and redness
- Apply the moisturizing mask: Take a pea-sized amount of the moisturizing mask and apply it evenly on your face, avoiding the eye and lip area. Use your fingertips or a clean brush to spread the mask in an upward motion to promote circulation
- Leave it on for the recommended time: Read the instructions on the packaging to determine the recommended duration for leaving the mask on your skin. Typically, it ranges from 10-20 minutes. During this time, relax and let the mask do its magic
- Rinse off and moisturize: After the recommended time has passed, gently rinse off the moisturizing mask with lukewarm water. Make sure to remove all traces of the mask. Pat your face dry and follow up with a moisturizer to lock in the hydration provided by the mask
- Remember, it’s always crucial to read the instructions provided with the specific moisturizing mask you are using, as different products may have slight variations in application and usage
Everything you need to know about our Moisturizing Mask!
Should I rinse off the moisturizing mask, or can I leave it on overnight?
It is generally recommended to rinse off a moisturizing mask after the specified duration mentioned on the product’s packaging. Leaving it on overnight might not provide any additional benefits and could potentially lead to clogged pores or skin irritation in some cases. It’s crucial to follow the instructions provided with the product to ensure maximum effectiveness and avoid any unwanted side effects. If you have any concerns or specific skincare needs, I would advise consulting with a dermatologist or skincare professional for personalized advice.
What are the key ingredients to look for in a good moisturizing mask?
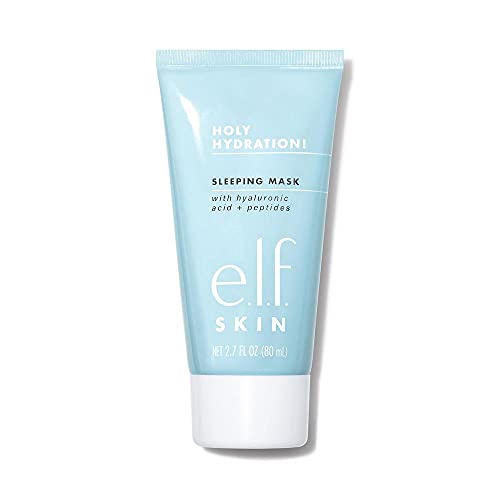
When searching for a good moisturizing mask, there are a few key ingredients you should look for. Firstly, hyaluronic acid is a great ingredient to seek out, as it attracts and retains moisture in the skin, keeping it hydrated and plump. Secondly, glycerin is a wonderful humectant that draws moisture to the skin, improving its softness and elasticity. Additionally, plant-based oils like argan oil, jojoba oil, or avocado oil are deeply nourishing and help to replenish the skin’s natural lipid barrier, keeping moisture locked in. Finally, ceramides are essential in a moisturizing mask as they help repair and strengthen the skin’s natural protective barrier. These key ingredients work together to provide optimal hydration and nourishment to your skin, leaving it supple, healthy, and radiant.
6 comments
To make the mask even more nourishing, I like to add a few drops of argan oil. It adds extra hydration and leaves my skin feeling soft and smooth.
Instead of transferring the mask to a container, can I just store it directly in the pot I used to make it? It seems like less hassle.
I find that using glass containers for storing homemade masks works best. It keeps the mask fresh and doesn’t react with any ingredients. Plus, you can easily see the contents inside.
Could you please write an article on DIY natural exfoliators? I love making my own skincare products and would love some ideas for exfoliating masks.
I followed the steps but my mask ended up being too runny. Any suggestions on how to fix this? Should I add more of a specific ingredient?
What is the general shelf life of a homemade moisturizing mask? I want to make sure I use it before it expires.