
We understand that removing hair extensions can sometimes be a daunting task, especially if you’re doing it at home. Whether you’re looking to switch up your style or simply give your natural hair a break, we want to reassure you that you’re not alone. In this blog post, we’ll guide you through the process of safely removing your hair extensions step by step, so you can achieve the result you desire without any worries or potential damage. So, sit back, relax, and let us take care of you and your hair!
Gentle and Efficient Hair Extensions Remover for Easy, Damage-Free Removal


Understanding Hair Extensions
Hair extensions are a popular way to add length, volume, and style to your natural hair. Whether you are looking for a temporary change or a long-term transformation, understanding the different types of hair extensions available is essential. In this blog section, we will provide a detailed overview of three common types of hair extensions: clip-ins, tape-ins, and bonded extensions. By the end of this article, you’ll have a clear understanding of each type, allowing you to make an informed decision when it comes to choosing the right extensions for you.

Clip-Ins
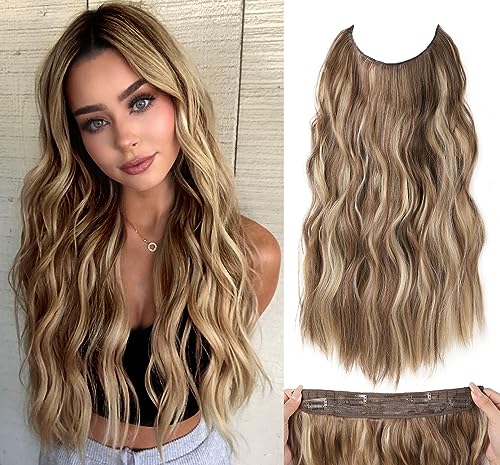
Clip-in hair extensions are a convenient and temporary option for those who want to experiment with longer or fuller hair, without committing to a permanent change. These extensions usually come in sets with multiple pieces that can be easily clipped into your natural hair. Here are a few key points to consider:
- Easy application: Clip-ins can be easily applied at home without the need for professional assistance.
- Versatility: They can be easily removed and repositioned, allowing you to create different hairstyles.
- Non-damaging: When properly applied and removed, clip-ins do not cause any damage to your natural hair.
- Recommended product: One popular brand of clip-in hair extensions is “GlamourLock Clip-Ins,” known for their high-quality, natural-looking hair pieces.
Tape-Ins
Tape-in extensions are becoming increasingly popular due to their long-lasting effects and seamless appearance. These extensions are applied by sandwiching a section of your natural hair between two adhesive strips. Here are some important details to know:
- Quick application: Tape-ins can be applied in a salon in a relatively short amount of time, providing immediate results.
- Natural look: The tape-in extensions lay flat against your scalp, creating a natural and discreet appearance.
- Low maintenance: With proper care, tape-ins can stay in place for up to 8 weeks before needing adjustment or maintenance.
- Recommended product: “SilkyStrands Tape-In Extensions” offer a wide range of natural hair colors and are known for their strong adhesive quality.
Bonded Extensions
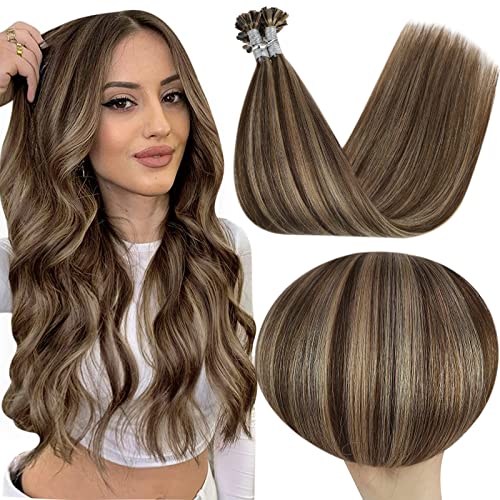
Bonded extensions, also known as keratin or fusion extensions, involve attaching individual hair strands to your natural hair using heat-activated keratin bonds. While they require professional application, bonded extensions offer long-term results. Here’s what you should know:
- Longevity: Bonded extensions can last up to six months with proper care and maintenance.
- Natural movement: These extensions blend seamlessly with your natural hair, providing a natural look and movement.
- Customizable: Bonded extensions can be customized to match your hair color, texture, and desired style.
- Recommended product: “EleganceBond Fusion Extensions” are known for their durable bonds and high-quality hair strands.
Preparing for Removal
Removing hair extensions at home can be a straightforward process with adequate preparation. By gathering the necessary tools and products, as well as knowing how to properly prepare your hair, you can ensure a smooth and gentle removal without causing damage. In this blog section, we will provide you with helpful tips and information to make your hair extensions removal experience a breeze.

Tools and Products for Hair Extensions Removal
When it comes to removing hair extensions, having the right tools and products is essential. Here are some items you should consider having on hand:
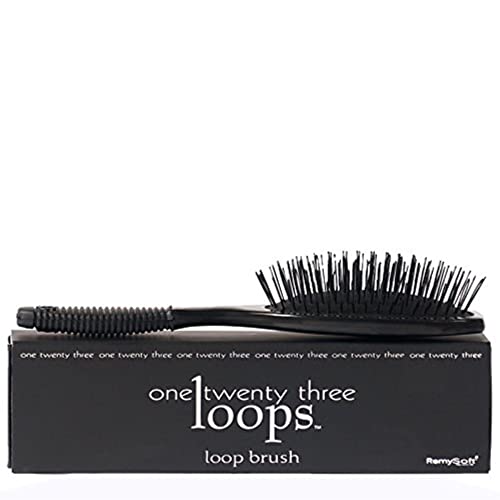
1. Wide-Toothed Comb or Detangling Brush
Using a wide-toothed comb or a detangling brush will help in gently separating your natural hair from the extensions. This will minimize any discomfort or potential hair breakage during the removal process.
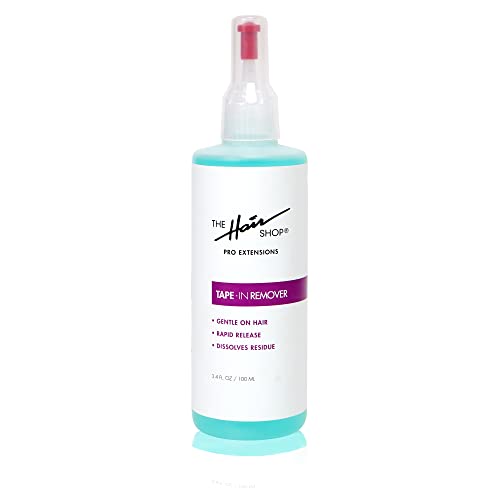
2. Hair Extension Removal Solution
Investing in a high-quality hair extension removal solution can make the removal process much easier. Look for a reputable brand that offers a gentle and effective formula, specifically designed for your type of hair extensions. Some popular options include [Brand A’s Hair Extension Remover Solution] and [Brand B’s Gentle Hair Extension Remover].
3. Hair Extension Pliers or Micro Rings Opener
If you have micro ring or micro link hair extensions, consider purchasing a pair of hair extension pliers or a micro rings opener. These tools will enable you to safely and effortlessly open the tiny rings or move them upward, allowing for easy removal without damaging your hair.
4. Hair Refresher Spray
To freshen up your natural hair after removing extensions, a hair refresher spray can be a great addition. Look for a spray that adds moisture and revitalizes your strands, such as [Brand C’s Hydrating Hair Refresher Spray] or [Brand D’s Nourishing Hair Refresher Mist].
Preparing Your Hair for Removal
Properly preparing your hair before the removal process can help ease any potential discomfort and prevent damage. Follow these simple steps to prepare your hair for removing hair extensions:
1. Detangle Your Hair
Start by gently detangling your hair using a wide-toothed comb or detangling brush. This will help remove any knots or tangles that may hinder the removal process.
2. Apply Hair Extension Removal Solution
If you’re using a hair extension removal solution, apply it to the areas where the extensions are attached to your natural hair. Ensure that you follow the instructions provided with the product for optimal results. Allow the solution to penetrate and loosen the adhesive or glue, making it easier to remove the extensions.
3. Gradually and Softly Remove Extensions
Once the removal solution has taken effect, begin slowly and softly removing the extensions from your hair. If you encounter any resistance, do not forcefully tug or pull at the extensions. Instead, apply more removal solution and gently work your fingers or the specialized tools mentioned earlier to separate the extensions from your natural hair.
4. Cleanse and Condition
After all the extensions have been removed, it’s essential to cleanse and condition your hair thoroughly. Use a clarifying shampoo to remove any residue from the removal solution or adhesive. Follow up with a nourishing conditioner to restore moisture and keep your natural hair healthy.
By following these tips and having the necessary tools and products on hand, you can ensure a successful and gentle hair extensions removal process. Remember to be patient and take your time, as rushing can lead to unnecessary damage or discomfort. Happy removal!
Step-by-Step Removal Process
Hair extensions can be a wonderful way to achieve the hair of your dreams. However, when it comes time to remove them, it’s essential to do so safely and gently. In this step-by-step guide, we will walk you through the removal process for various types of hair extensions, giving you the specific techniques and precautions required for each type.
Clip-In Extensions
Clip-in extensions are a popular choice for their ease of use and versatility. To remove clip-in extensions, follow these steps:
- Start by carefully combing through your hair to remove any tangles or knots.
- Locate the clips that are securing the extensions to your natural hair.
- Gently release the clips by pressing on the top and bottom, opening them up.
- Once all the clips are released, gently pull the extensions out of your hair.
- Use a wide-tooth comb to remove any tangles or residue left behind.
- Store your clip-in extensions in a safe place for future use.
Tape-In Extensions
Tape-in extensions offer a more seamless and natural look. To remove tape-in extensions, follow these steps:
- Begin by applying a bond remover or adhesive remover specifically designed for tape-in extensions to the bond area. This will help to dissolve the adhesive.
- Using your fingers or a tail comb, gently lift the tape tabs from your natural hair, starting from the bottom and working your way up to the roots.
- As you remove each tape tab, be cautious not to pull or tug on your natural hair.
- After all the tape tabs are removed, use a clarifying shampoo to thoroughly cleanse your hair and remove any adhesive residue.
- Use a wide-tooth comb to detangle your hair, starting from the ends and working your way up to the roots.
Fusion Extensions
Fusion extensions provide a long-lasting and natural-looking result. To remove fusion extensions, follow these steps:
- Start by applying a bond dissolver or extension glue remover to the bond area. Allow it to sit for the recommended amount of time, as specified by the product instructions.
- Using a fusion hair extension tool or pliers, gently squeeze the bond, breaking it apart.
- Once the bond has been loosened, use your fingertips or a comb to carefully slide the extension away from your natural hair.
- Continue this process for each individual bond, taking care not to pull or tug on your hair.
- After all the extensions have been removed, wash your hair with a gentle clarifying shampoo to remove any residue.
Cleansing Your Natural Hair
Properly cleansing your natural hair after removing extensions is crucial to maintaining its health. Here are some tips to guide you:
- Choose a gentle shampoo: Look for sulfate-free shampoos that won’t strip your hair of its natural oils. Brands like SheaMoisture and OGX offer great options for gentle cleansing.
- Focus on the scalp: When shampooing, concentrate on massaging the scalp to remove any buildup or residue. Be gentle to avoid any unnecessary damage.
- Follow up with a moisturizing conditioner: After rinsing out the shampoo, apply a moisturizing conditioner to replenish any lost moisture. Look for conditioners specifically designed for your hair type. Pantene and Tresemme have a wide range of options to suit various needs.
- Detangle with a wide-tooth comb: Before rinsing out the conditioner, use a wide-tooth comb to gently detangle your hair. Start from the ends and work your way up, being careful not to cause any breakage.
- Rinse thoroughly: Make sure to rinse out all the conditioner from your hair to avoid any product buildup. Leaving residue can weigh your hair down and make it appear dull.
Conditioning for Optimal Hair Health
Conditioning your natural hair is essential to keep it well-nourished and healthy. Consider the following steps:
- Deep conditioning treatment: Treat your hair to a deep conditioning treatment at least once a week to restore moisture and strengthen damaged hair. Brands like TGIN and Mielle Organics offer excellent deep conditioners for various hair types.
- Leave-in conditioner for added moisture: After washing your hair, apply a leave-in conditioner to provide extra moisture and protection throughout the day. Cantu and SheaMoisture have fantastic leave-in conditioners that can help with detangling and softening your hair.
- Protective styling: Consider wearing protective styles like braids, twists, or buns to minimize exposure to external factors that may cause damage. These styles can also help retain moisture and reduce breakage.
Styling Your Natural Hair
Styling your natural hair after removal requires a gentle approach to maintain its health. Here are some tips to keep in mind:
- Avoid excessive heat: Minimize the use of heat styling tools such as flat irons and curling wands, as they can cause damage and weaken your hair. Opt for heatless styling methods like twist-outs or braid-outs instead.
- Use heat protectants: If you do choose to use heat styling tools, apply a heat protectant spray or serum beforehand. This will create a barrier between your hair and the hot tool, reducing the risk of heat damage. John Frieda and Garnier Fructis offer reliable heat protectant products.
- Moisturize regularly: Regularly moisturizing your hair is crucial to avoid dryness and breakage. Use a moisturizing spray or cream to keep your hair hydrated throughout the day. Creme of Nature and Alikay Naturals have effective moisturizing products suitable for various hair types.
- Protect your hair while sleeping: Invest in a satin or silk bonnet, pillowcase, or scarf to protect your hair while you sleep. These materials help minimize friction and prevent your hair from drying out overnight.
Remember, taking care of your natural hair post-extension removal is essential to maintain its health and promote growth. By following these tips and using the right products, you can ensure that your hair remains strong, luscious, and vibrant.
Taking Care of Your Hair and Scalp
In conclusion, taking off hair extensions at home can be a feasible option if you follow the right procedures and prioritize caution. Nevertheless, if you are uncertain or don’t feel confident in doing it alone, it’s always best to turn to a professional for assistance. Above all, be kind to your natural hair and prioritize its well-being throughout the removal process.
12 comments
Thank you for your comment! Understanding the type of hair extensions is crucial for a successful removal process. In the article, we focused on tape-in extensions, but we can definitely provide more information on other types like clip-ins, sew-ins, or fusion extensions in a future article.
There’s often a debate on whether it’s better to remove hair extensions at home or go to a professional salon. What are your thoughts on this topic?
That’s a valid point of discussion! While some people prefer removing extensions at home to save money and time, others prefer going to a professional to ensure a safe and proper removal. We encourage readers to consider their level of experience and comfort before deciding. Both options have their pros and cons.
I struggled with removing hair extensions for the first time, but after following your step-by-step process, it was a breeze! Thank you for the detailed instructions.
We’re thrilled to hear that our step-by-step process helped you! It’s always great to know when our readers find our articles helpful. If you have any suggestions for future topics or any other questions, feel free to let us know!
I’ve heard that hair extension removal can be painful and damaging to natural hair. Can you discuss any potential pain points and how to minimize damage?
Great question! Hair extension removal can be uncomfortable and may cause some hair breakage if not done properly. In the article, we mentioned the importance of using a good quality extension remover and being gentle while detangling. We’ll make sure to include more tips on minimizing damage in future articles.
I have a tip to share! Applying a generous amount of oil or conditioner to the hair extensions before removal made the process much smoother for me. It helped to loosen the bonds. Give it a try!
Thank you for sharing your tip! Applying oil or conditioner can indeed help to soften the bonds and make the removal process easier. We appreciate your contribution and hope it helps other readers as well.
I would love more details on the aftercare and maintenance of natural hair after removing extensions. Can you provide some tips on how to keep the hair healthy?
Thank you for your question! After removing extensions, it’s essential to give your natural hair some extra care. We will definitely write an article focusing on aftercare and maintenance, including tips on deep conditioning, avoiding heat styling, and using nourishing hair products. Stay tuned!
I’m really interested in learning more about the different types of hair extensions and how they affect the removal process. Can you provide more information on that?